I still remember the heartbreak of slicing into a beautiful sourdough boule I’d carried all the way from a boulangerie near the Rue Montorgueil in Paris, only to find it had gone stale overnight. The baker had wrapped it in paper, but I’d made every mistake possible once I got back to my apartment – plastic bag, room temperature, near the window. Disaster.
That experience sent me on a mission to understand how the French actually keep their bread fresh. And what I discovered completely changed the way I store bread at home in Portland. Whether you’re dealing with a rustic sourdough, a soft sandwich loaf, or a buttery brioche, the right storage method makes all the difference between day-old magic and sad, crumbly waste.
Today I’m sharing everything I’ve learned – including a simple, foolproof everyday French-style bread you can bake at home, plus the exact storage techniques that will keep it tasting bakery-fresh for as long as possible.
Why Bread Goes Stale (It’s Not What You Think)
Most people assume bread goes stale because it dries out – but the science tells a different story. Staleness is actually caused by retrogradation, a process where starch molecules recrystallize and firm up over time. This happens fastest at refrigerator temperatures, which is why the French never, ever store their bread in the fridge.
I learned this from a charming boucher in Lyon who moonlighted as an amateur food scientist. He explained it simply: “Le réfrigérateur, c’est l’ennemi du pain.” The refrigerator is the enemy of bread. And he was absolutely right – cold temperatures accelerate staleness up to six times faster than room temperature storage.
Understanding this one principle will immediately transform how you treat your bread at home.
The French Approach to Bread Storage
In France, bread is bought fresh every single day – often twice. The tradition of the morning and evening baguette run exists precisely because the French understand that truly great bread has a short, glorious window of perfection. But when daily bakery trips aren’t possible, they rely on a few tried-and-true methods.
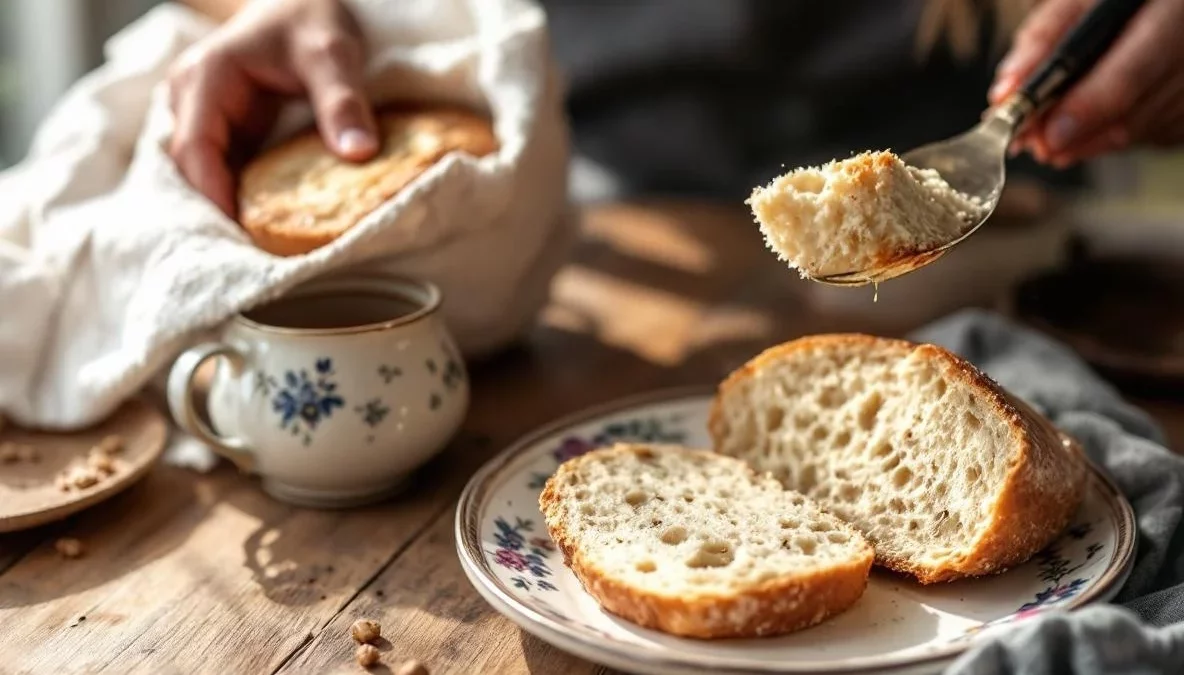
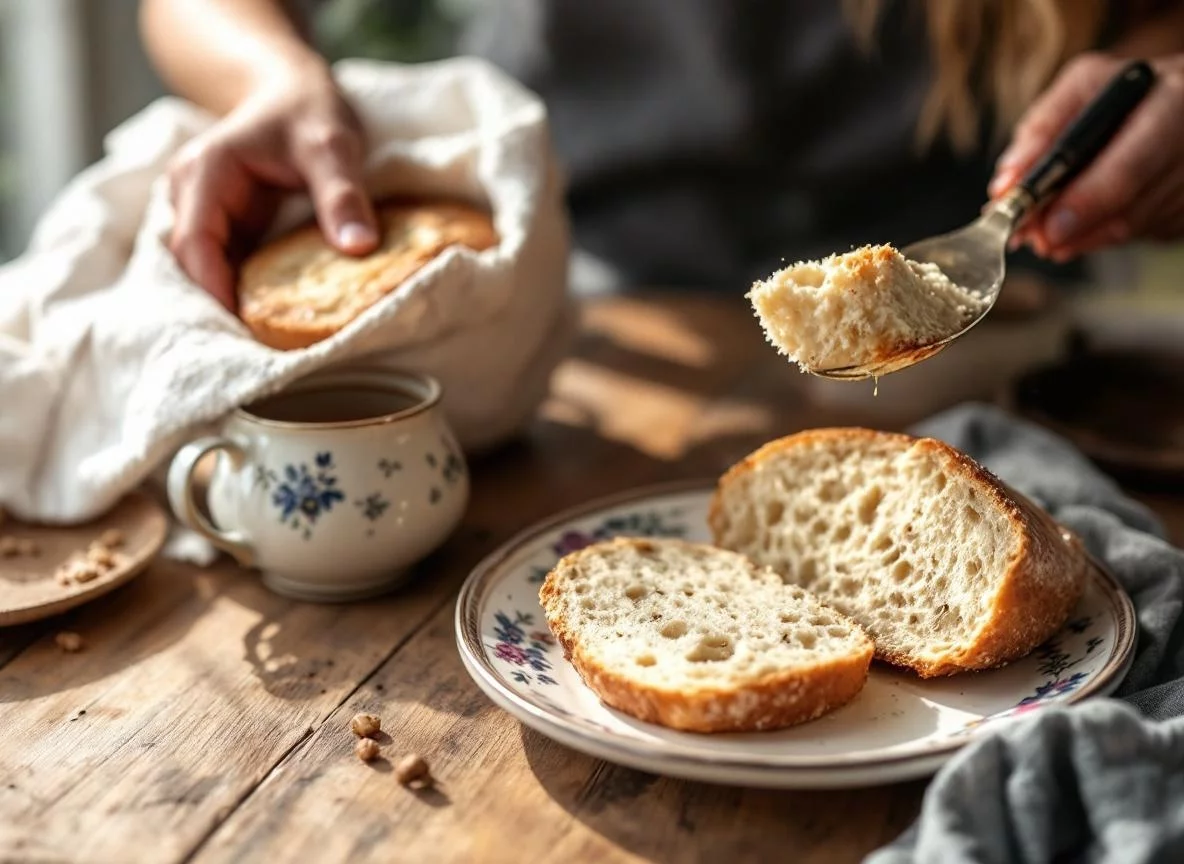
The first rule: always store bread cut-side down on a wooden board or inside a cloth bag. The exposed crumb dries faster than the crust, so keeping it face-down protects the interior while allowing the crust to breathe. A linen bread bag – the kind you’ll find hanging in every French kitchen – is the gold standard for room temperature storage.
The second rule: never use plastic bags for crusty bread. Plastic traps moisture and turns a crackling crust into a soft, rubbery disappointment within hours. Plastic is only acceptable for very soft, enriched loaves like brioche or sandwich bread that need to retain their softness.
Common Bread Storage Mistakes to Avoid
After teaching dozens of home bakers through our Buffalo Bakery community, I keep seeing the same mistakes repeated. Here’s what to stop doing immediately:
Mistake #1: Storing bread in the refrigerator. As we’ve established, the fridge is the fastest route to stale, rubbery bread. The only exception is in very hot, humid climates where mold is a serious concern – and even then, freezing is a better option than refrigerating.
Mistake #2: Storing bread in a sealed plastic bag on the counter. Plastic prevents the crust from breathing and creates a humid microenvironment that softens everything and encourages mold. Use paper, cloth, or a proper bread box instead.
Mistake #3: Leaving bread near heat sources. Near the stovetop, in direct sunlight, or close to a toaster – all of these will dry your bread out in hours. Store bread in a cool, dry, dark spot away from heat.
Mistake #4: Slicing the whole loaf before storing. Every cut exposes more crumb to air. Only slice what you need and keep the rest of the loaf whole for as long as possible. Store it cut-side down or press a piece of plastic wrap against the cut surface only.
Mistake #5: Wrapping warm bread in plastic. Always let bread cool completely before wrapping or storing. Trapping steam inside creates condensation, leading to a soggy crust and accelerated mold growth.
How to Freeze Bread the Right Way
Freezing is the single best method for long-term bread storage – and the French use it more than you might think, especially for baguettes. The key is to freeze bread as soon as possible after it has fully cooled, before any staling or moisture loss has occurred.
For whole loaves, wrap tightly in plastic wrap first, then in a layer of aluminum foil, and place in a zip-lock freezer bag. This triple barrier prevents freezer burn and keeps the bread tasting remarkably fresh for up to three months.
For sliced bread, freeze individual slices separated by parchment paper so you can pull out exactly what you need. A frozen slice goes straight into the toaster – no thawing required – and emerges warm and delicious in minutes. I keep a bag of pre-sliced sourdough in my freezer at all times for this exact reason.
To revive a frozen whole loaf, thaw it at room temperature still wrapped, then finish in a 350°F (175°C) oven for 10-15 minutes. The crust will crisp up beautifully and the bread will taste almost freshly baked.
Reviving Stale Bread Like a French Baker
Even with perfect storage, bread eventually stales. But here’s something wonderful I discovered in that same Paris apartment kitchen: stale bread can be almost entirely revived with water and heat. Run the stale loaf briefly under cold water – yes, actually wet it – then place it in a 350°F (175°C) oven for 10 minutes. The steam generated inside the crust will re-gelatinize the starch and restore a surprising amount of freshness.
This technique works best within the first two to three days of staleness. Beyond that, it’s time to embrace the French tradition of cooking with day-old bread: pain perdu (French toast), breadcrumbs, croutons, or the classic Provençal panisse. Wasting bread is practically a cultural crime in France – and once you start cooking with stale bread, you’ll understand why.
Everyday French-Style Country Loaf |
|
|
|
|
A simple, rustic French-style country loaf with a crackling crust and open, chewy crumb – the kind of bread worth storing properly. Made with a short overnight ferment for depth of flavor, this everyday loaf pairs beautifully with everything from morning butter to evening soups.
|
|
|
Author: Sarah – Buffalo Bakery
Category: Bread, Baking, French Technique
Cuisine: French
|
|
|
Prep Time: 20 minutes Cook Time: 45 minutes |
Total Time: ~13 hours (with overnight rise) Yield: 1 large loaf (serves 8-10) |
Ingredients |
|
|
|
Instructions |
|
|
|
| 🥐 Sarah’s Pro Tip | |
|
The secret to a loaf that stays fresher longer? Don’t underbake it. A pale, soft crust traps moisture inside and leads to a gummy crumb that molds faster. Bake until you’re almost worried it’s too dark – that deep caramel crust is a natural barrier that protects the interior and adds incredible flavor. And remember: a linen bread bag is one of the best kitchen investments you’ll ever make. I’ve had mine for six years and it has saved more loaves than I can count. Avoid plastic for crusty breads at all costs – it is the sworn enemy of a beautiful crust. |
|
|
Nutrition Information (per slice, approx. 1/10 loaf):
Calories: 185 | Protein: 6g | Fat: 1g | Carbs: 38g | Sugar: 1g |
|
| Keywords: how to store bread, keep bread fresh, bread storage tips, French country loaf, homemade bread recipe, bread goes stale, freeze bread, bread box, sourdough storage | |
Quick Reference: How Long Does Bread Last?
Storage times vary significantly by bread type. Crusty artisan loaves like this country bread or a baguette are best within 1-2 days at room temperature – their magic is in that fresh crust, which softens quickly. Soft sandwich loaves and enriched breads like brioche, which contain butter, eggs, or milk, stay fresh for 4-5 days at room temperature thanks to their higher fat content acting as a natural preservative. Sourdough is the champion of natural shelf life: its acidic environment inhibits mold, keeping it good for up to 4-5 days stored cut-side down. And in the freezer, virtually any bread keeps beautifully for up to 3 months – making it the single smartest storage strategy for home bakers.
Mastering bread storage is the natural companion to mastering bread baking. You’ve put in the time, the love, and the ingredients – it only makes sense to protect your creation and enjoy it at its very best for as long as possible.
Once you start treating your bread the way a French baker would – with respect, the right environment, and a good linen bag – you’ll be amazed at how much better every slice tastes. I’d love to see your loaves and hear how your storage experiments are going. Share your photos with the Buffalo Bakery community and let me know your own bread-keeping secrets!